This guide provides instructions for downloading, installing, accessing and licensing ArcGIS Pro on a Windows computer using your Duke NetID. ArcGIS Pro is Esri’s professional desktop GIS software for advanced mapping, spatial analysis, and data visualization.
Please note that ArcGIS Pro is available only for Windows currently. If you are using a Mac, check the solutions from here.
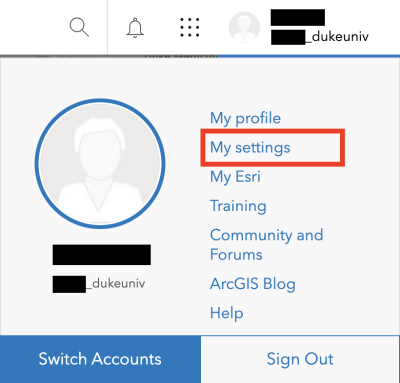
1. On the ArcGIS Online page, click your profile icon in the top right corner, then select My settings from the dropdown menu.
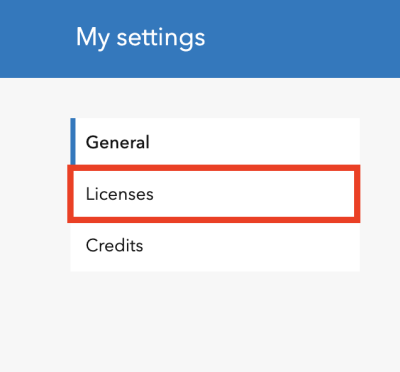
2. Navigate to the Licenses tab from the side menu.
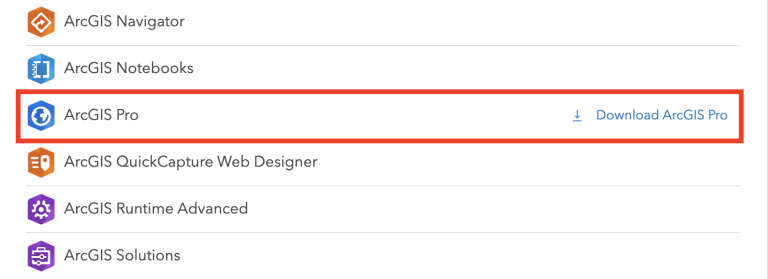
3. Locate ArcGIS Pro in the list, and click on Download ArcGIS Pro.
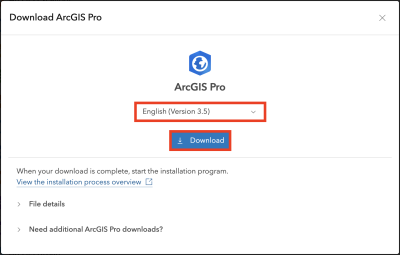
4. Select your preferred language and click Download.
Installing ArcGIS Pro
1. After the download is complete, locate the ArcGIS Pro installer in your Downloads and open it.
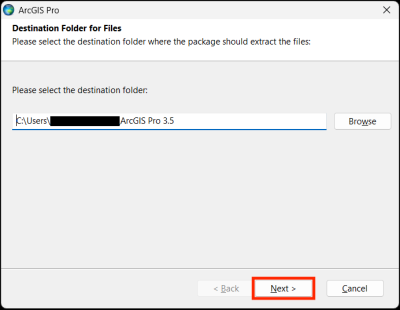
2. Choose a destination folder on your computer and click Next.
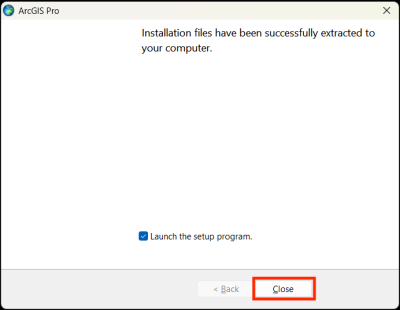
3. Click Close.
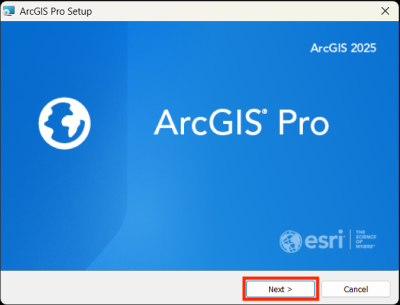
4. Click Next.
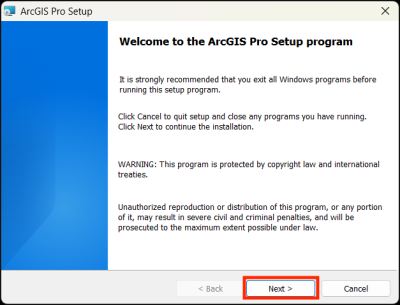
5. Click Next.
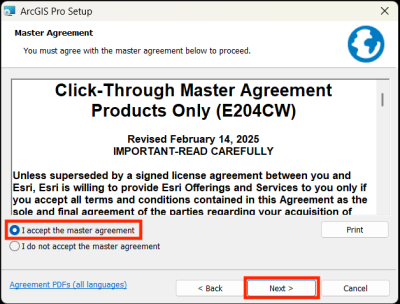
6. Check ‘I accept the master agreement’ and click Next.
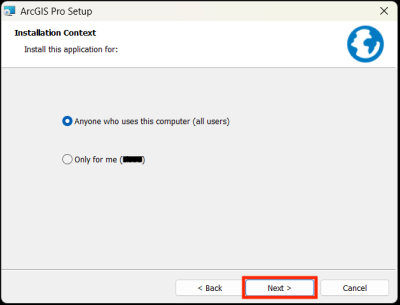
7. Select access type and click Next.
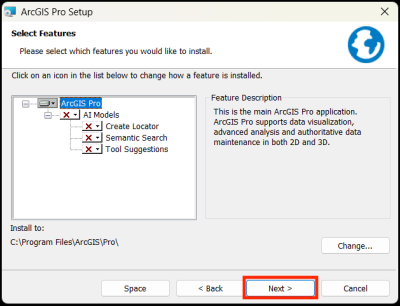
8. You can choose to install additional features. Let’s keep it as default now and click Next to continue.
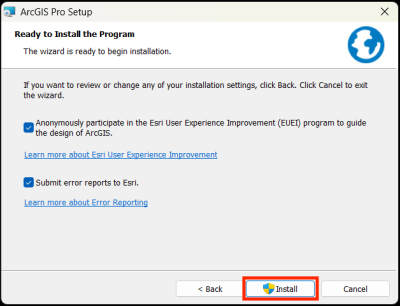
9. Click Install.
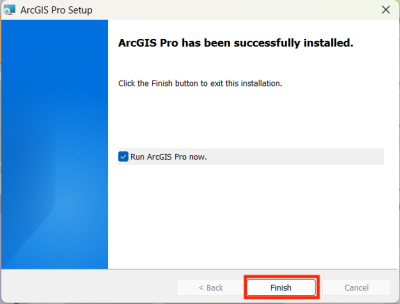
10. Click Finish.
Accessing and Licensing using NetID
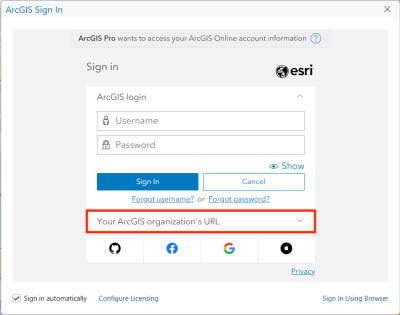
1. Open ArcGIS Pro on your computer.
2. Select Your ArcGIS organization’s URL.
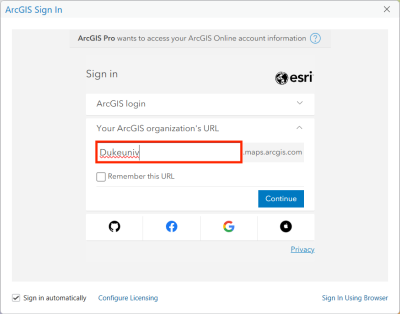
3. Type in ‘Dukeuniv’ in the box and click Continue.
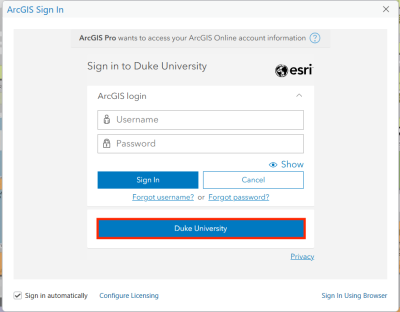
4. Click Duke University.
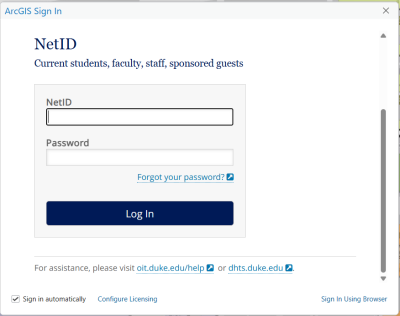
5. Log in through the Duke login page using your NetID and password.
You’re now logged in to ArcGIS Pro!
Troubleshooting
If you encounter any technical issues installing or using ArcGIS Pro, Esri Community is a good place to start.
If the problem persists or your issue is not addressed there, please contact the Data and Visualization Librarian, Siti Lei (siti.lei@dukekunshan.edu.cn) for further support.